The hub of your Quickbooks account and where all your transactions appear
- Click on the “Gear” icon in the top right corner of your Quickbooks Online account
- Click on “Chart of accounts” from the menu list

The list shows you transactions assorted by “Account type”. The account type tells Quickbooks what it should track.
To see how to create account types, click here.
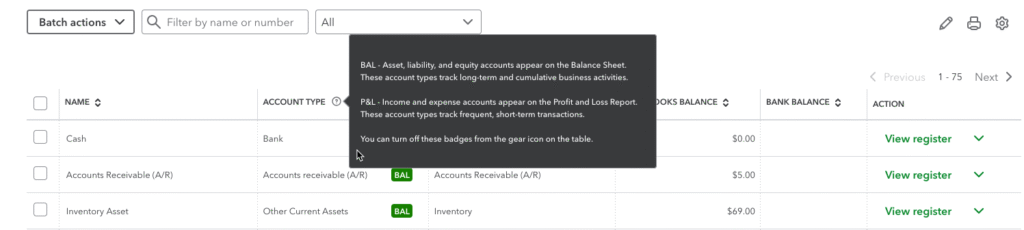
The balance section, “BAL” in your chart, tells you what you have versus what you owe. It primarily documents and tracks bank accounts and credit cards.
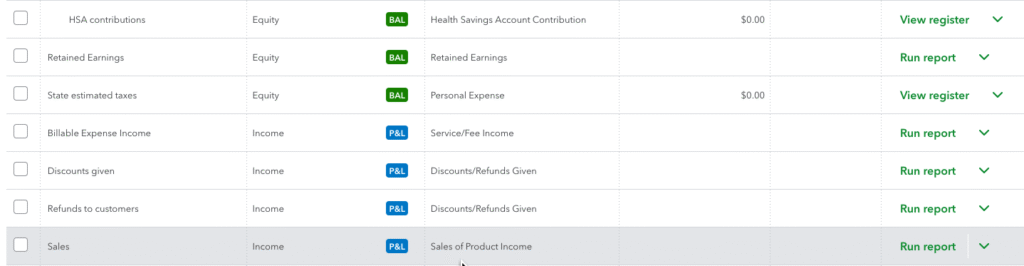
Scrolling down the list, the Chart of accounts will show you “P&L”, or your Profits and Losses for your business. It shows how well your business is doing over a certain amount of time. To view, you can click on the “Run report” link.
There are three main categories to track in your Chart of accounts.
Name – give your account a unique name to track. Use all capital letters to clearly distinguish between accounts created by you and those created by Quickbooks
Account type – determines what transactions can be recorded in the account and the account’s position on financial statements
Detail type – determines where on company tax forms the balance of that account will appear
Creating a New Account
- Click on “New” in the upper right corner of the Chart of accounts page
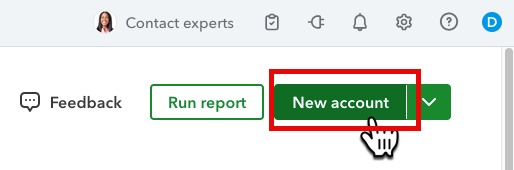
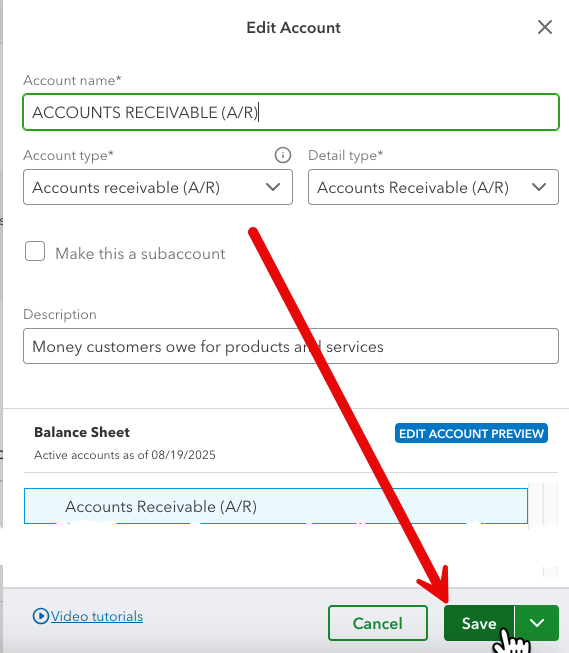
The “New Account” window will open
Fill in your account name, account type and detail type
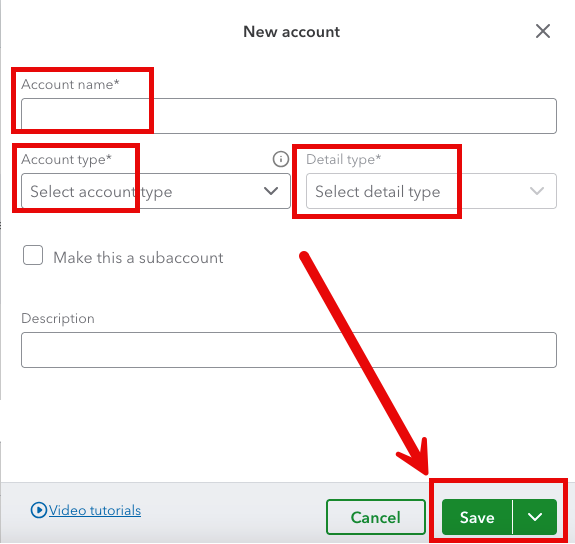
- Click “Save” in the lower right corner
- If you need to save multiple accounts, click the drop-down arrow
- Click “Save and new” from the list
- Click the drop-down and “Save” to exit the new account page
You should now be back out on your Chart of accounts main page
You can also edit existing Quickbooks account types.
- Hover over the line of the account
- Click on the drop-down arrow
- Click on “Edit”
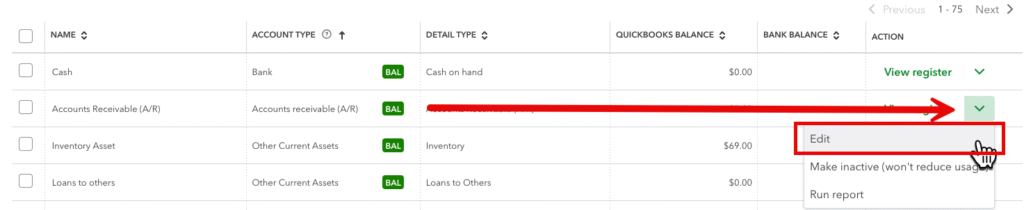
- Edit your account
- Click “Save” in the lower right corner